Wednesday, March 31, 2010

1am


Excuse the bad lighting in the photo's... it is only 1am.
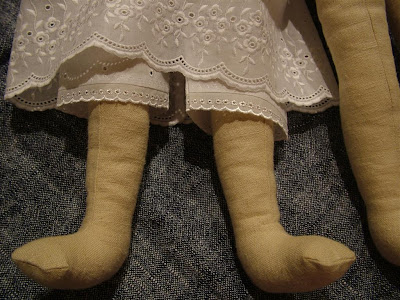
I have entered the wonderful world of doll making which is surprisingly fun,
but incredibly (crazily) time consuming.
We have a birthday coming up, and I thought leaving myself a week to make these would be ample time.
However I am coming to terms with the fact that the dolls may be bald.

They do have the prettiest of petticoats and bloomers, that must count for something?
I am still trying to work out why I spent tonight making their underwear when I should have finished embroidering their faces and giving them hair. 
I never seem to be able to complete a task in logical order.

And incase you are feeling peckish at this hour of the morning,
here is a photo of the birthday cupcakes that went into school today yesterday.
I managed to overdose on butter cream icing, and spent the day feeling rather poorly.
Lets hope I can make it to bed before the next hour passes.

Saturday, March 27, 2010

markets

We've had a bit of a lazy Saturday.
Managed to venture out late morning to check out some local handmade markets for kids which was a lot of fun.
They were the Billycart Markets.
Its always nice to have a chat to the stall holders talk about handmade.
I would love to have my own stall one day, but with three little one's that idea may just have to go on hold.
 My life is chaotic enough as is!
 
My friend Rachel was there with her stall Art Wish, selling beautifully painted reward charts for kids.
I also met Sophie from Barefoot Babies with her stunning range of children's clothing.
And I was totally inspired by the beautiful handmade horses by Calamity Bolt.
Each horse was so unique and beautifully detailed.


The girls also held their own markets on our coffee table this morning.
Beautiful artworks, handmade paper toys, paper baby blankets etc, were all on sale.
They spent well over an hour preparing stock!

How do you like the picture of the dog on the rainbow lead in the middle?
Its totally killing me with cuteness!
Might have to turn this one into an embroidery so I can enjoy it for years to come.
They spend hours drawing, cutting and sticky taping things together daily.
Grace's cutting skills are nothing short of impressive.
It means I constantly have confetti like debris strewn throughout the house (and not to mention the mash of paper pulp I keep pulling off the roof of Jude's mouth) but it is all so worth it.

If the day ever did come where I was able to have my own stall,
I know I would have two very keen helpers who would want to sell their own wares,
and probably out do their mother!

Wednesday, March 10, 2010

recycled dino shirt :: mini tutorial


So, I know this is not exactly the best thing I have ever made...but I thought I would share the idea of how I made it with you.
The two different fabrics are both from old t-shirts. The dino print one is a newborn sized shirt that belonged to Jude, and the green was a shirt of mine. 
 
If you are interested in making one, grab your favorite tee pattern and two old shirts, then follow along!
(If you were after a picture heavy tutorial, I apologise in advance. This is a bit of a hack job).

Cut your two shirts open down the side seams.
Place your shirt front and back pattern pieces on the larger shirt lining up the bottom of the pattern with the hem of the shirt.
This way you wont have to hem your shirt when your done (I like it , I like it!).
Then lay the sleeve pattern pieces along the bottom hem of the smaller shirt, and cut.
Sew your shirt up according to pattern direction and add some ribbing for the neckband.
The onesie tutorial will help you out if you are unsure about binding/ribbing.

Then bar tack your seams to one side (to the back looks best) on the sleeve edges, and at the bottom of the side seams on body.


So... not exactly rocket science.
But you do get a kick out of recycling two un-used shirts, and not having to bother with heming or binding edges (apart from neck).
It's amazing how much time that saves!
Enough time in fact to add a few cute patches on the front...


The dinosaurs were cut from left over fabric.
Cut a circular cardboard template to the size you want your patches (mine were 3 different sizes).
Cut your fabric 1cm wider all around than the template.
Stitch around the edge of fabric circles with a large straight stitch, then gather the circle to fit around the cardboard.
Give it a good steam iron to press into shape. Pull out your cardboard.
Add some iron on adhesive to back of patch if you like.
Something like Vliesofix, heat and bond...or equivalent.
Iron patches onto garment. Top stitch around edges to finish.

And there you have it! 
One fun recycled (or is it upcycled??) tee with super cute button patches.

Thursday, March 4, 2010

today


Todays objective:
  • To find the floor in the sewing room (I kid you not)
  • relocate all the fabrics, sewing supplies and sewing machines strewn throughout the house, to their rightful place
  • claim back the dining table to be used for what it was designed for. Yes, we are all a tad sick of eating our dinner surrounded by piles of my stuff!
  • by the end of the day, having a room I can actually sew in
 And to achieve all this with a crawling babe underfoot (yes, the boy can crawl!), will be nothing short of impresive.
Wish me luck!


 ['mousie' is a childhood friend of mine. Trust me, her picture is much prettier than my sewing room right now. Isn't she cute!]