Showing posts with label childrens clothing. Show all posts

Thursday, April 28, 2011

easter bonnet


This was an Easter gift for our little niece Honor (who is a bit too young to be feasting on chocolate).
The velor was cut from an old hoodie, and made for a very soft bonnet!
Pattern is from Ottobre 4/10.

Sunday, March 27, 2011

hello autumn, hello pretty blouse


We pulled some warmer clothes out of the cupboard this morning - some with sleeves, how nice! The freshness in the air is making me feel like Autumn has set in, and I'm loving it. I was probably a little over ambitious dressing the kids in layers this morning - by lunch time they had stripped off and replaced their jeans with shorts. Oh well... it was nice while it lasted.
For those of you that have been reading along here for a while (a long long while) you may remember this sweet little blouse and pretty knitted vest. The vest was knitted by my Mum and the blouse was one I made - for Grace. Its so nice to see them back in use again!

Tuesday, November 16, 2010

shorts


New shorts for the boy, made from some pretty cheerful fabric I picked up from Spotlight last summer. It can be so hard to come by decent fabrics for little boys, so when I saw this one I had to add it to the stash. It feels so good to have finally turned it into something wearable, and at the same time made a little more room in the sewing cupboard! I have used this pattern a few times now, and really like it (Ottobre 3/2008). They did turn out a tad longer than I had planned, but at the rate this babe is growing its no issue at all. And our machine/engine loving boy highly approved of the fabric choice, which was a first! Lots of 'brrr brrr, rooom rooom' noises, excited squeals and frantic pointing with pudgy little hands. He is so lovable!

Thursday, November 11, 2010

on our feet


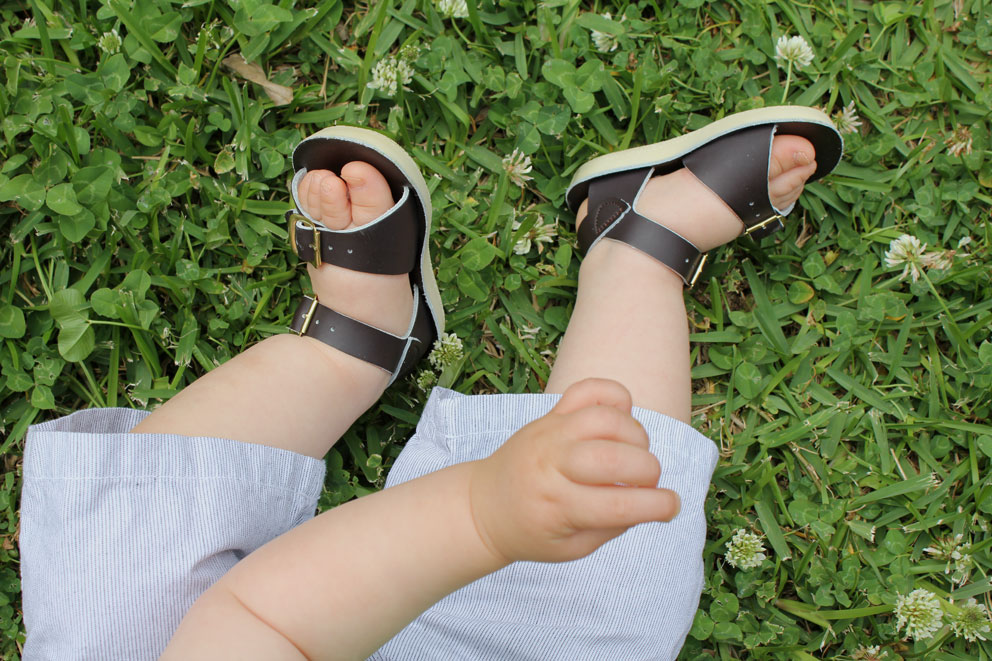
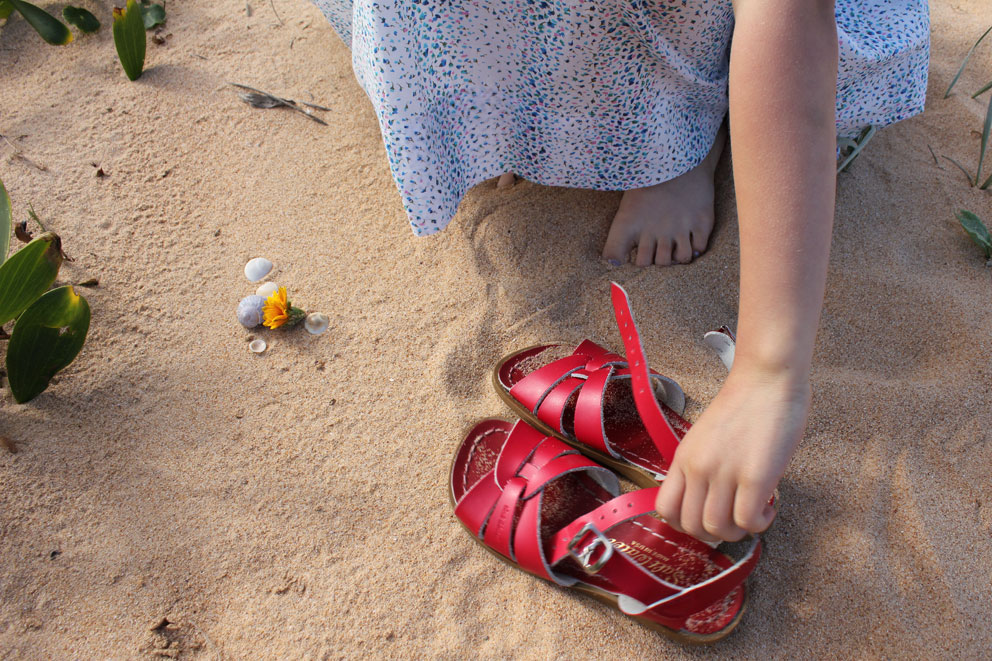
I have a confession to make. Our shoes basket seems to be overflowing with the arrival of many pairs of Saltwater sandals. And you cant blame me, can you? They are just so simple, colourful and downright funky! Just in time for the warmer weather and beach wanderings. This is the first time I have been able to find Saltwaters for sale in Australia, so I was a little more than overjoyed when I saw them pop up in a local children's wear shop. I then found some ebay bargains, and ordered some for me and the boy from the State's, and before you knew it, the basket by the front door was full. Jude's pair (Surfer style), are his first real shoes, and when I tried them on him, he danced around in circles yelling 'Oh wow! Shzz!'. And the best bit... they fit all of us perfectly with no blisters in sight.
Happy feet, Happy days!


Saturday, November 6, 2010

flashback friday


 The lovely Abby of Sew Much Ado was very kind to feature me this week on Flashback Friday. 
Head over here to read more. Thankyou Abby!

Friday, October 29, 2010

summer frocks


 After pricing summer dresses in the local children's clothes shop, I came home determined to make my own. Sure the one's in the shop were nice, but seriously overpriced for little girls. I have a stash of lovely voile's in the cupboard, so when I saw this gorgeous dress Ansia had made for her daughter, I just had to give it a go. The instructions can be found here on 'From an Igloo'. My girls are so happy with the result. Soft and floaty, feminine and twirly! Grace chose the subtle floral voile which suits her perfectly. She is steering clear of bright colour choices these days. Maeve still loves all things pink, so the checks were her choice. She looks adorable. We had such a lovely afternoon at the beach. The breeze was up, but that didn't stop the squeals of delight as the girls raced up and down the sandy slopes. Jude and I did a little shell collecting. Spring = happy days.


Tuesday, June 8, 2010

milo soaker


Well that was an energetic photo session! Monkey boy (for some reason or another) couldn't manage to sit still for more than two second to have his photo taken. Not a great help when you are learning to use the new camera and trying to manually focus...sorry for the blurry shots, these were the best I could get!

I finally got around to finishing the knitted soaker. It came together nicely as per the picture, but didn't end up fitting quiet as snug as I would have liked. Although it looks OK in the photos, it could have done with less rise in the front and a little extra in the back. I kept having to pull it up at the back to keep it over his nappy while he was busy rocketing around the house, and the front was too bunched up. Still very cute and might work well over a bulkier night nappy. He is wearing this one over these fitted's I made for Maeve a while back. I will get them lanolised tonight and see how they go over the next few days.

Has anyone else used wool covers with their cloth nappies (diapers)?
I would love to hear what patterns you found the best and how successful you found them as a nappy cover. I made quiet a few for Grace back in the day and they were great. I found they worked the best in summer with just a shirt or dress over the top. In winter they got a bit bulky layered under thick pants and the likes.

The pattern was from 'Vintage Baby Knits' By Kristen Rengren. I knitted it in the 9-12month size, but next time would probably go smaller. The wool I used was the most softest Merino from Lincraft 'Italiano donegal merino' in 12ply. It didn't seem as chunky as your usual 12ply however. This soaker used up just over one 50g ball.

And here he is doing the bolt in his woolies...

Thursday, May 13, 2010

kids clothes :: day 3


Well, yesterday wasn't quite as productive as I would have liked. Nothing got sewn, or even cut out for that matter. I traded in my sewing hour for a nice dinner out with my man, which was totally worth it! I will probably have to put the next few days on hold as well, as we are off the the Blue Mountains for a weekend away with only one child!
Anyway, here are some fabrics and pattern I have out to get creative with. Its easy to see what season we are coming into just by looking at the fabrics and colours I have chosen. Only 18 days till Winter!
I am thinking of Sewing the Oliver + S Sunday Brunch Jacket for Grace. I would also like to sew her a floral gathered top of some sort to go with the Jacket. Maeve seems pretty well off for clothes at the moment as I just unpacked all Graces old size 3 winter clothes. I might make Jude some pants similar to the ones I just made for Maeve, and he needs some fleecy sleep suits to wear over his pj's with the cooler weather coming. Hopefully I will report back Sunday!

Wednesday, May 12, 2010

kids clothes :: day 2


I am back for day two of the Kids Clothes Week Challange over at elsie marley! The objective here was to make a pair of pants my 'skirts-and-dresses-only' girl would actually wear. I thought they turned out pretty cute. When I showed her this morning there was a very long pause before she finally commented, but she is happy with them...phew! The embroidered heart on the pocket was a hit.

Tuesday, May 11, 2010

kids clothes :: day 1


Here's my first completed item of kids clothing, sewn last night and embroidered on this morning. This is part of Elsie Marley's Kids Clothes Week Challenge. Wow, try saying that really fast with your mouth stuffed full of biscuits. Could be messy.
Anyway, back to the shirt. This one is a baby gift and the pattern is from Ottobre 3/2010. Its the Savanni Voile tunic. Such a sweet pattern, and I am so glad it comes in Maeve's size. You will probably see more of these soon.

kids clothes week

A last minute decision: 
To join in the action over at Elsie Marley's Kids Clothes Week! 


Anyone else in on the fun? 
I will be off for a cup of tea soon, then sew till I drop.

And to get the ball rolling, here is a skirt I made for Grace about two weeks ago (technically cant be counted though). I didn't use a pattern, just based it off an old denim skirt she has worn to death. Seriously, you could put your finger through the fabric! This fabric is a lovely light denim I scored at the Salvo's last time I visited. I have plenty more to make something for Maeve. Now, off for that caffeine fix...

Wednesday, March 10, 2010

recycled dino shirt :: mini tutorial


So, I know this is not exactly the best thing I have ever made...but I thought I would share the idea of how I made it with you.
The two different fabrics are both from old t-shirts. The dino print one is a newborn sized shirt that belonged to Jude, and the green was a shirt of mine. 
 
If you are interested in making one, grab your favorite tee pattern and two old shirts, then follow along!
(If you were after a picture heavy tutorial, I apologise in advance. This is a bit of a hack job).

Cut your two shirts open down the side seams.
Place your shirt front and back pattern pieces on the larger shirt lining up the bottom of the pattern with the hem of the shirt.
This way you wont have to hem your shirt when your done (I like it , I like it!).
Then lay the sleeve pattern pieces along the bottom hem of the smaller shirt, and cut.
Sew your shirt up according to pattern direction and add some ribbing for the neckband.
The onesie tutorial will help you out if you are unsure about binding/ribbing.

Then bar tack your seams to one side (to the back looks best) on the sleeve edges, and at the bottom of the side seams on body.


So... not exactly rocket science.
But you do get a kick out of recycling two un-used shirts, and not having to bother with heming or binding edges (apart from neck).
It's amazing how much time that saves!
Enough time in fact to add a few cute patches on the front...


The dinosaurs were cut from left over fabric.
Cut a circular cardboard template to the size you want your patches (mine were 3 different sizes).
Cut your fabric 1cm wider all around than the template.
Stitch around the edge of fabric circles with a large straight stitch, then gather the circle to fit around the cardboard.
Give it a good steam iron to press into shape. Pull out your cardboard.
Add some iron on adhesive to back of patch if you like.
Something like Vliesofix, heat and bond...or equivalent.
Iron patches onto garment. Top stitch around edges to finish.

And there you have it! 
One fun recycled (or is it upcycled??) tee with super cute button patches.

Sunday, February 28, 2010

tie tee


Check out this little shirt!
I found the tutorial on Saltwater kids via 'Celebrate the boy' on Made, and knew I had to make one for my boy. 
You could make so many fun variations with this simple pattern.
I am thinking a few long sleeved ones for winter would be really cute too.
The t-shirt pattern is one from Ottobre 3/08.

Wednesday, February 24, 2010

just for fun


A few weeks back when I was tossing up ideas for the baby boy's onesie, I came up with this logo of 'the boy', which my brother helped me to polish up- thanks Tim! To cut a long story short, I decided to go with the striped onesie instead. Then later I thought some of you might like it to use it. Maybe its more your style, bold and out there rather than subtle and sweet?


You can stencil it with freezer paper (Dana's tutorial here). Or,  I have even reversed the images on the second page of PDF so it can be printed onto Iron on Transfer paper, cut out and ironed directly onto garment. 
I found that ironing it onto stretch wasn't the best idea, the imaged seemed to crack a little as the fabric stretched. So, one solution might be ironing it onto plain white woven fabric, then stitching it to the garment. Or you can try the reverse applique technique (which is what I've done on this outfit... don't look too close, very rough!).


don't you just want to squeeze the boy!


ok ok, enough of the photo's mum. My eyes are blinded by the light!


And a side note for those of you that live in Australia:
I have found that Spotlight now sells Freezer Paper for stenciling at the cutting counter. You can buy it by the meter, instead of having to purchase the whole roll which is just brilliant if you are only wanting to do one or two stencils!